Are you looking for a way to collect email addresses from your visitors?
Adding a squeeze page is an easy way to narrow down your users’ attention and build an email list. It helps convert your audience by offering incentives in exchange for their email address.
In this article, we will show you how to create a squeeze page in WordPress.
What Is a Squeeze Page?
A squeeze page (also known as a lead page) is a type of landing page that’s designed to collect or squeeze your visitor’s email address and name. In return, you can offer a valuable resource, ebook, exclusive learning material, or free products.
Unlike a standard landing page, where you could have multiple goals, a squeeze page’s purpose is to get users to give up their email addresses.
For example, here’s a squeeze page by a Digital Marketer that encourages users to sign up for their Insider Newsletter.

It has a clear call to action button, and the page includes a clear copy of what users will get in return. Plus, the headline is eye-catching, and there are images on the page that help capture users’ attention.
Creating a squeeze page is a proven way of building an email list, which you can use to promote your products or services in the future. Collecting emails also lets you start a newsletter and inform subscribers of new products, deals, and campaigns.
That said, let’s see how to create a squeeze page in WordPress.
Creating a Squeeze Page in WordPress
The easiest way of setting up a squeeze page in WordPress is by using SeedProd. It is the best and easiest WordPress website and landing page builder.
To get started, you can choose from different high-converting templates and customize the page using the drag-and-drop builder. The plugin also integrates with popular email marketing tools.
Aside from a squeeze page, SeedProd lets you create a coming soon page, 404 error page, custom login page, and more. Its theme builder also allows you to create a custom theme without editing code.
Please note that we’ll use SeedProd Pro for this tutorial because it includes more templates and customization options. However, there is also a SeedProd Lite version you can use for free.
Setting Up SeedProd in WordPress
First, you’ll need to install and activate the SeedProd plugin. If you need help, then please see our guide on how to install a WordPress plugin.
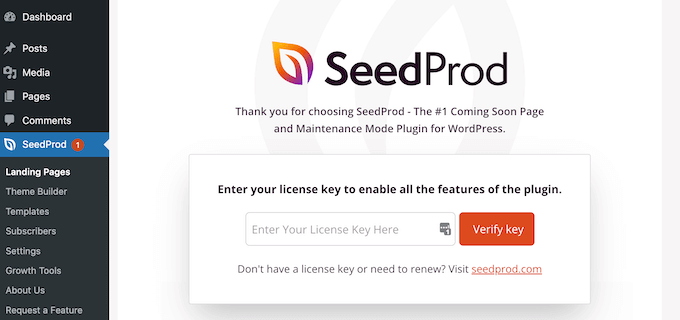
Upon activation, you will see a welcome page in your WordPress dashboard. On this page, you can enter the license key and click the ‘Verify key’ button. If you’re unsure where the key is, then you can easily find it in the SeedProd account area.
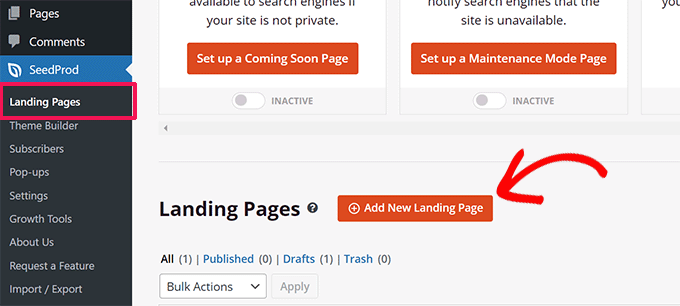
After that, you’ll need to go to SeedProd Landing Pages from the admin panel.
From here, simply click the ‘+ Add New Landing Page’ button.
Next, SeedProd will offer different templates to choose from.
You can click the ‘Lead Squeeze’ filter at the top to view squeeze page templates.
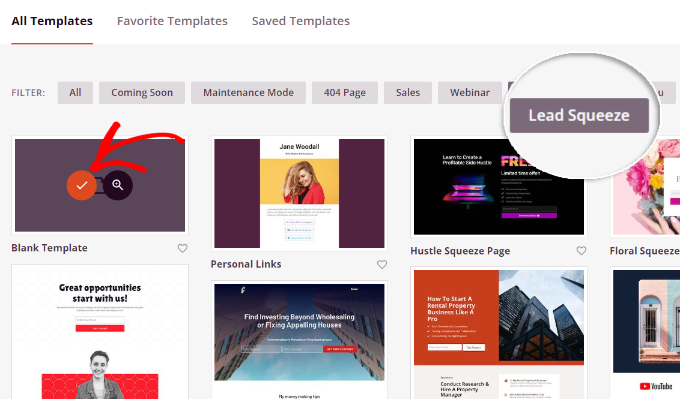
To choose a template, simply hover it and click the orange tick button.
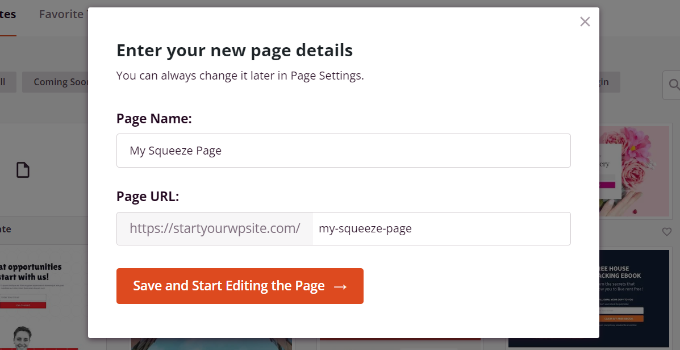
Next, a popup window will open where you can enter a name and URL for your squeeze page. Once that’s done, click the ‘Save and Start Editing the Page’ button.
After that, you’ll see the SeedProd drag-and-drop landing page builder.
Customizing Your Squeeze Page Using SeedProd
In the page builder, you can edit different elements on the template. For instance, there are different blocks to choose from.
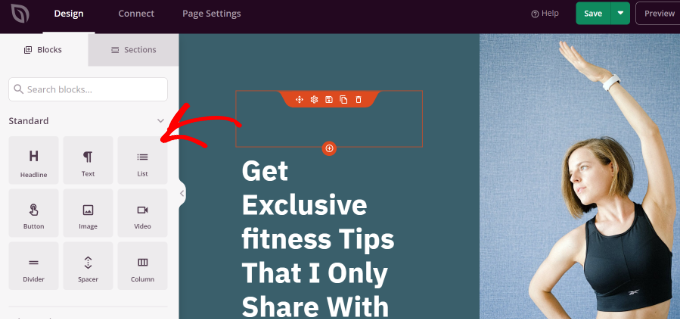
You can add standard blocks like headlines, text, lists, buttons, and more. Or select advanced blocks such as social sharing, countdown, video popup, testimonials, and more.
SeedProd also lets you customize each element or block further. For example, selecting the headline block will let you edit the text and change its font, color, and style.

With SeedProd, you can also use the power of artificial intelligence to automatically create images and text for your page. However, do note that the AI Text and Image Generation tool is a paid addon.
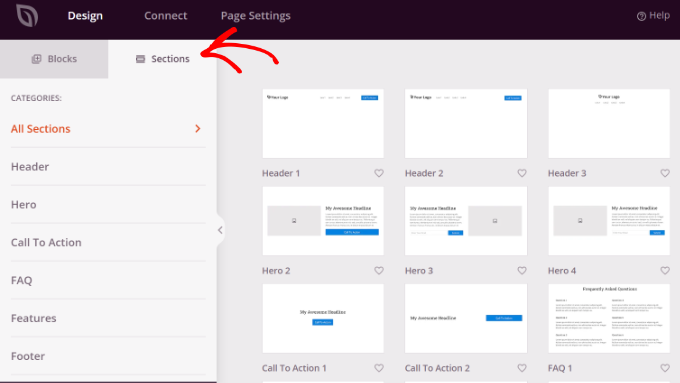
If you switch to the ‘Sections’ tab, then you’ll find entire sections to add to your squeeze page. For example, you can add custom headers, footers, call to action buttons, and more to your page.
Connecting Email Marketing Tool with SeedProd
After you’ve customized the squeeze page, you’ll need to connect an email marketing tool with SeedProd.
To do that, switch to the ‘Connect’ tab, and you’ll see different services. For instance, SeedProd easily integrates with ActiveCampaign, AWeber, Drip, Mailchimp, Constant Contact, and more.
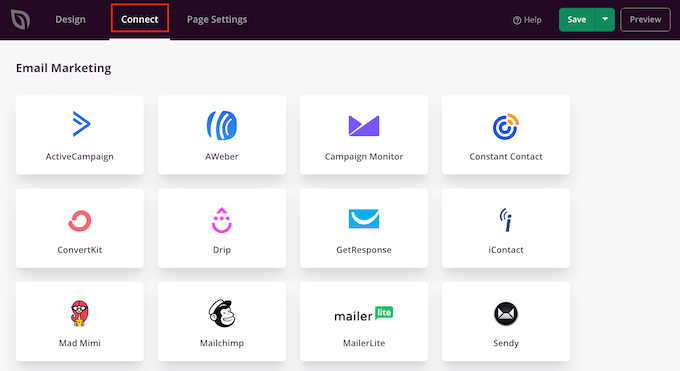
Simply follow the onscreen instructions to connect your desired email marketing service with SeedProd.
Finalize Your Squeeze Page Settings
Next, you’ll need to head to the ‘Page Settings’ tab in SeedProd.
Here, you can change different settings and publish your page. For instance, SeedProd lets you change the page title, edit the meta description, add Google Analytics, and more.
Once you’ve made the changes, it’s time to make your squeeze page live. Simply change the ‘Page Status’ from Draft to Publish.
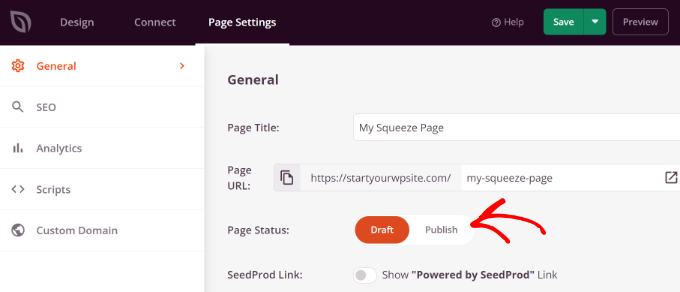
You can now click the ‘Save’ button at the top and exit the landing page builder.
From here, simply visit the squeeze page URL and see it in action.

Bonus: Tips to Boost Conversions on Your Squeeze Page
Now that you know how to create a squeeze page on a WordPress site, you can take it to the next level by following these tips for boosting conversions.
1. Converting Exiting Visitors into Subscribers
Did you know that 70% of visitors will abandon your website and never return? What if you could change that and boost conversions on your squeeze page?
With the help of OptinMonster, you can show personalized messages to users at precise times and convert them into subscribers.
It is the best conversion optimization and lead generation software in the market that offers an Exit-Intent technology. OptinMonster will automatically detect users’ behavior and show a popup message just as a user is about to leave your squeeze page.

You can learn more by following our guide on how we increased email subscribers by 600% using OptinMonster.
2. Get Users to Subscribe to Push Notifications
You can add a click-to-subscribe button on your squeeze page and encourage users to sign up for push notifications.
Push notifications are custom messages with links that you can send to your subscribers. They are great for bringing people back to your site, prompting your content, and boosting sales.

One of the best ways to set up push notifications to WordPress is by using PushEngage. It is the best push notification software and is very easy to use.
For more details, please see our guide on how to add web push notifications to a WordPress site.
3. Leverage the Power of Social Proof to Boost Conversions
You can also use social proof to increase the number of people who submit their email addresses on a squeeze page.
For instance, you can show other users who subscribed to your email list. This makes other visitors more comfortable and helps build trust.
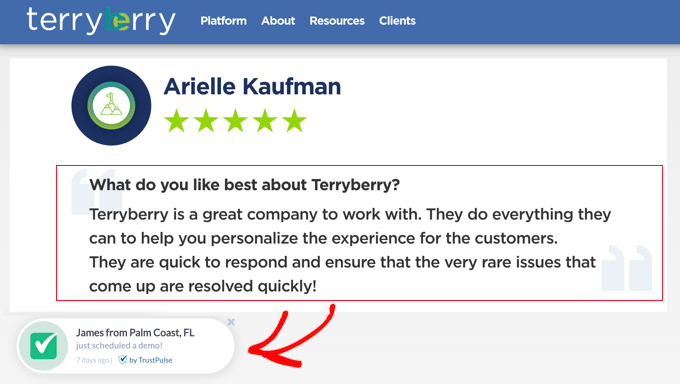
You can go through our guide on how to use FOMO on your WordPress site to increase conversions to learn more.
We hope this article helped you learn how to create a squeeze page in WordPress. You may also want to see our guide on proven ways to make money online and how to increase blog traffic.
If you liked this article, then please subscribe to our YouTube Channel for WordPress video tutorials. You can also find us on Twitter and Facebook.

