Are you looking to add a product question and answer section in WooCommerce?
Adding a Q&A section enables customers to ask questions about the product before buying it, and see the questions and answers of other customers. This helps recover abandoned cart sales and improve customer engagement in your store, and reduce support requests.
In this article, we’ll show you how to easily add product questions and answers in WooCommerce.
Why Should You Add Product Q&A in WooCommerce
You may have noticed the product question-and-answer section on popular eCommerce websites like Amazon, Target, Best Buy, and more.
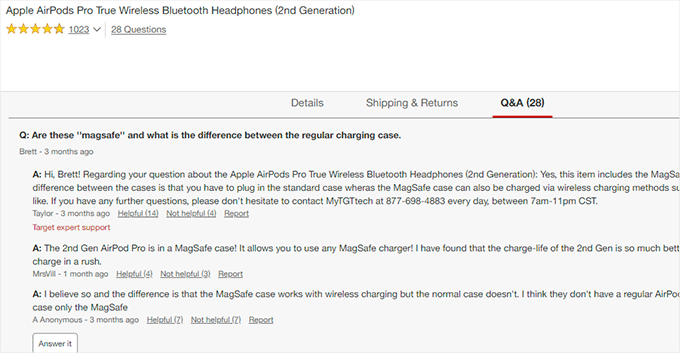
Adding a product questions and answers section allows customers to ask questions about a product right there on the product page.
You or your customers can then answer that question and it becomes visible to all other new customers who may have the same question in mind.
Over a period of time, your product page will have its own frequently asked questions section, which will help increase sales and reduce abandoned cart rates.
Adding a question and answers section to your online store also allows you to curate user-generated content which improves your WooCommerce product search rankings.
That being said, let’s see how you can easily add product questions and answers to WooCommerce.
1. Adding a Product Q&A Section Using a Premium Plugin
For this method, we will be using the YITH WooCommerce Questions and Answers plugin.
It is a premium plugin and comes with more features to easily add an engaging Q&A section with a better user experience.
First, you need to install and activate the YITH WooCommerce Questions and Answers plugin. For more instructions, please see our step-by-step guide on how to install a WordPress plugin.
Upon activation, go to the YITH » License Activation page and enter your license key. You can find this information under your account on the plugin website.
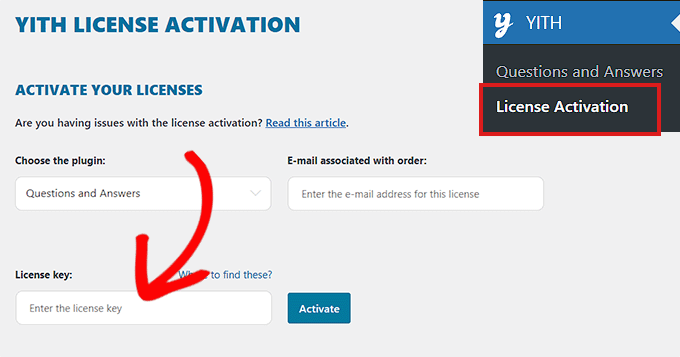
Don’t forget to click on the Activate button after entering your license key.
Next, you need to go to the YITH » Questions and Answers page to configure plugin settings.
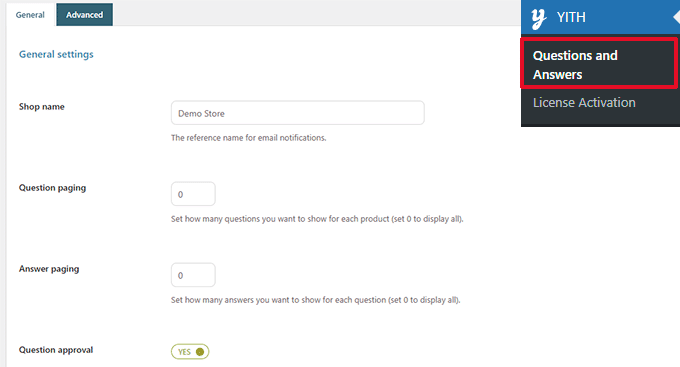
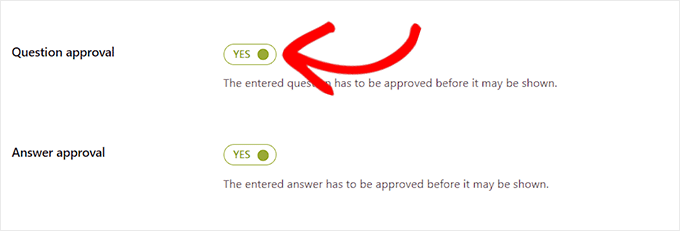
From here you need to scroll down to the ‘Question Approval’ option and simply toggle the switch to ‘Yes’.
Once you do that, the questions on the product pages will have to be approved by an administrator before they are displayed on your WooCommerce store.
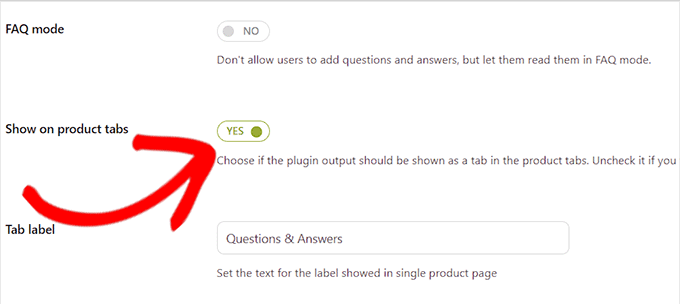
Next, you need to scroll to the ‘Show on Product Tabs’ option.
Here, you need to toggle the switch to ‘Yes’ so that the plugin will automatically add a ‘Questions and Answers’ section to product pages.
After that, don’t forget to click the ‘Save Options’ button to store your changes.
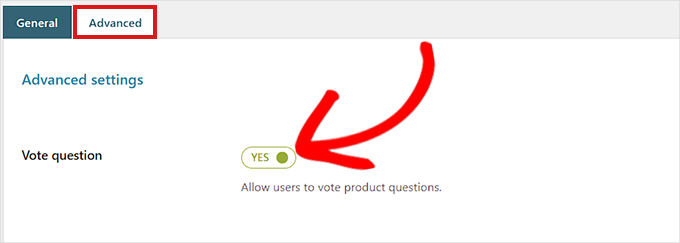
Now, you need to switch to the ‘Advanced Settings’ tab.
From here, simply toggle the ‘Vote Question’ switch to ‘Yes’ if you want to allow users to vote on product questions.
Next, you can choose if you want to get an email notification once a question is submitted on your website.
Simply select the ‘Notification in HTML Email’ option from the dropdown menu next to the ‘New question notification’ field.
Tip: To ensure email deliverability you need to use an SMTP server. See our guide on how to fix WooCommerce not sending emails issue.
Similarly, you can also choose the ‘Notification in HTML Email’ option in the ‘New answer notification’ field if you want to receive an email once a question is answered on your site.

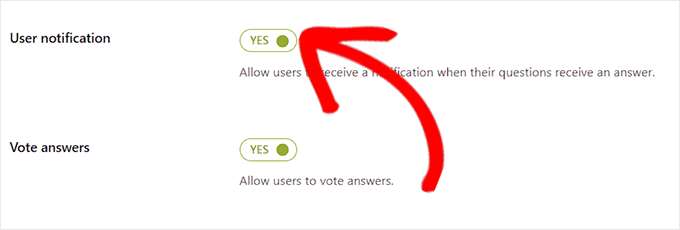
Your user can also receive a notification once the question submitted by them is answered.
To enable this, you need to toggle the switch next to the ‘User Notification’ option to ‘Yes’.
After that, you can review other settings. The default options would work for most websites but you can change them if needed.
Finally, don’t forget to click on the ‘Save Options’ button to save your changes.
You can now visit your website to see the Questions & Answers section appear on your product pages.
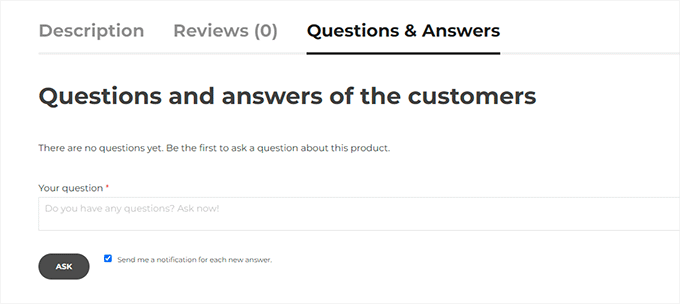
From here, your customers can submit their questions.
Moderating Questions and Adding Answers
You will receive an email notification for new questions submitted by the users. You can also view them by visiting the Questions & Answers » All discussion page.
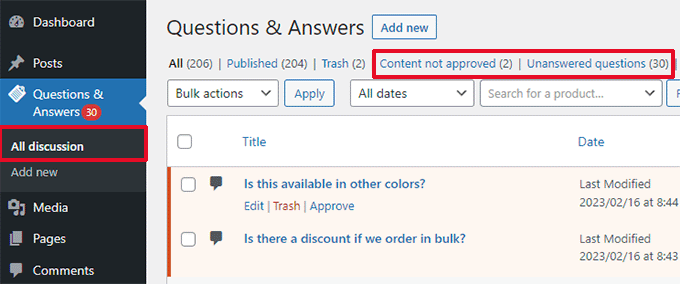
You can sort entries here by ‘Content not approved’ or ‘Unanswered Questions’.
You can also take your mouse over a question and click ‘Approve’ to make it live.
To add an answer to a question, you can simply click on the ‘Edit’ link below that question. On the edit screen, scroll down to the ‘Your Answer’ section to answer the question.
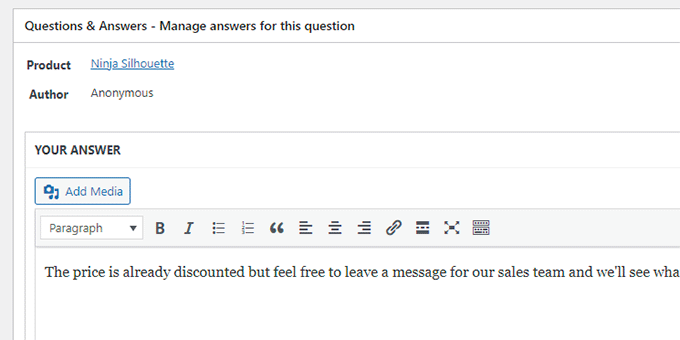
Repeat the process if you have more unanswered questions.
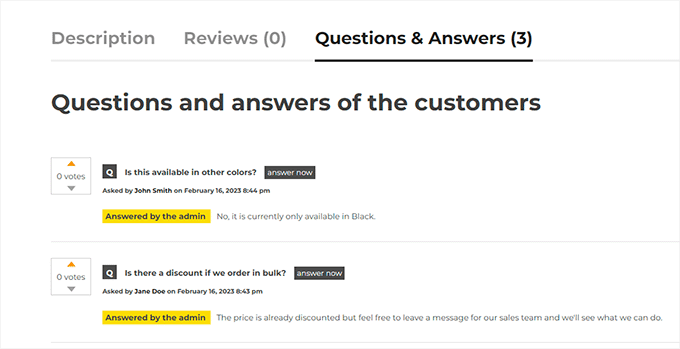
This is how the product questions and answers section looked on our demo store.
2. Adding a Product Q&A Section Using a Free Plugin
If you want to use a free plugin to add a product Q&A section to your WooCommerce store, then this method is for you.
First, you need to do is install and activate the Product Questions & Answers for WooCommerce plugin. For more instructions, see our guide on how to install a WordPress plugin.
Upon activation, click the Product Q&A menu from the WordPress admin sidebar which will direct you to the ‘Product Q&A Settings’ page.
From here, simply check the ‘Load More’ option if you want to add a ‘load More’ button to your product Q&A section.
Adding this button will allow customers to load older questions and reduces the page load time if a product gets a ton of questions.
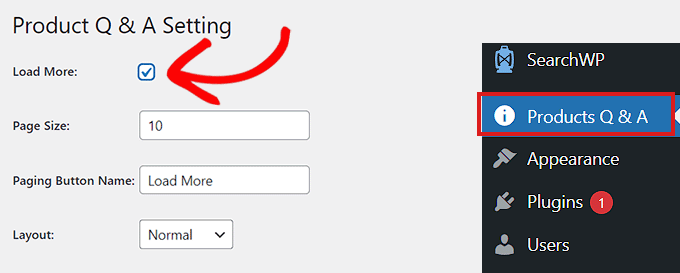
Next, you need to choose a page size.
This means that you need to select a default number of questions that are shown in your Q&A section.
All the other questions will be hidden from view. Users will be able to access those questions after clicking the ‘Load More’ button.
You can also change the text used for the ‘Load More’ button to anything you like. For instance, you can call it ‘Load more questions’.

Next, you need to choose a layout for your product Q&A section from the dropdown menu next to the ‘Layout’ option.
You can choose the ‘Normal’ option if you want to display the Q&A section in paragraphs.

On the other hand, you can also display your questions as an Accordion menu. This means users will need to click on a question to view the answer.
Once finished, don’t forget to click the Submit button at the bottom to save your settings.
Managing Product Question and Answers
After plugin configuration, simply visit any product page on your store. You’ll notice a new Q&A tab added there.
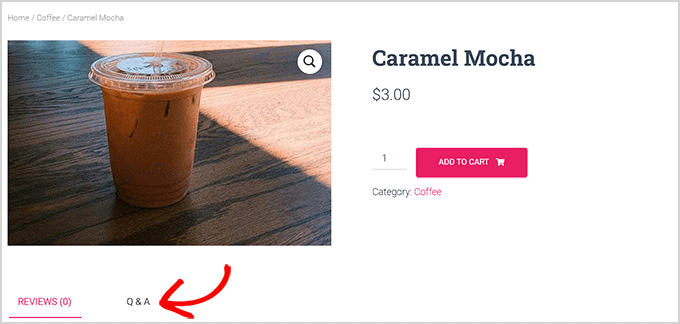
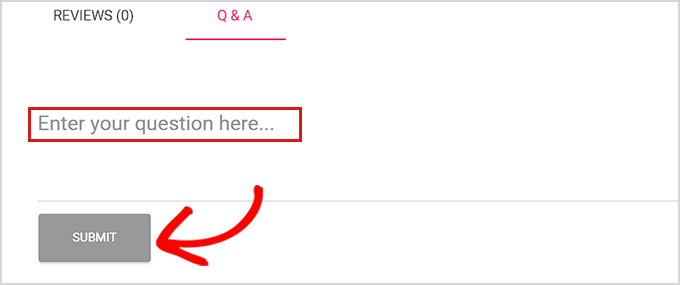
Clicking on it will display the ‘Q&A’ section where customers can submit their questions.
You will receive an email notification when a user submits a question.
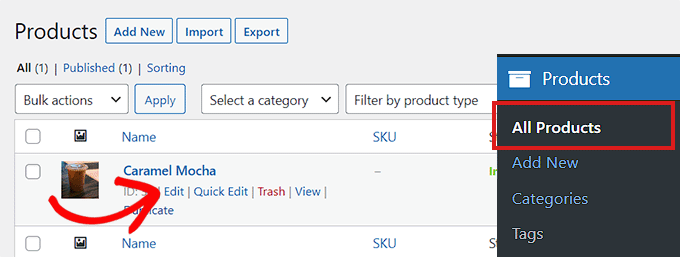
Now, to answer customer questions, you need to go to the Products » All Products page from the WordPress admin dashboard.
From here, simply click the ‘Edit’ button under a product to open up its’ ‘Edit Product’ page.
Next, you need to scroll down to the ‘Product Data’ section and click the ‘Q&A’ tab from the left column.
Here, all the questions submitted on that specific product’s page will be displayed.
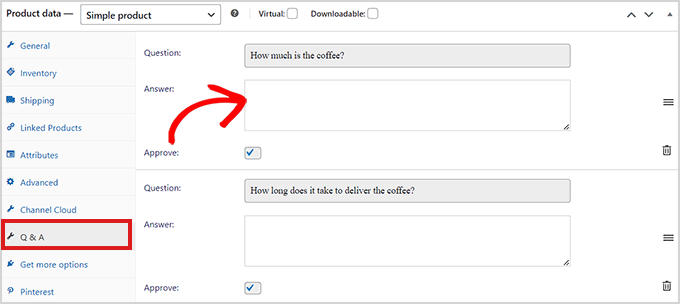
Now, you need to simply type the answer to a customer query in the ‘Answer’ field.
If you want to delete a question because it’s inappropriate or irrelevant to your product, then you can also do that by clicking the Delete icon on the right corner of each question.
You can also uncheck the ‘Approve’ option if you don’t want to display the question on the product page.

After you have answered the product questions, go to the top of the page and click the ‘Update’ button to save your changes.
Now, you can visit the product page to see the Questions and Answer section in action.
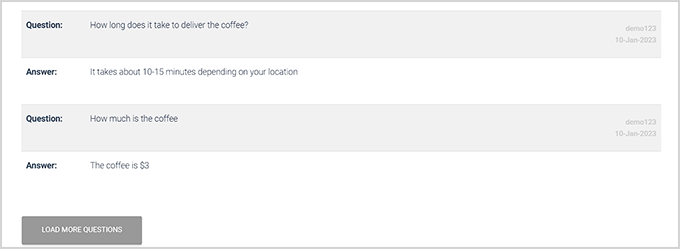
We hope this article helped you learn how to add product questions and answers in WooCommerce. You can also check out our top picks for the best WooCommerce plugins to grow your store, and our beginner’s guide on how to add web push notification to boost sales.
If you liked this article, then please subscribe to our YouTube Channel for WordPress video tutorials. You can also find us on Twitter and Facebook.

