
Interested in starting a business and considering using the internet to conduct your transactions? Do you long for the day when you can sit back and watch as your online store generates passive income without any effort on your part?
It’s natural to wonder how to sell online without keeping your own inventory or how to start an online store in general. Read our how-to manual to learn how to launch a web store immediately, even if you have no products or prior eCommerce expertise.
What is Print on Demand?
With the Print on Demand (POD) dropshipping business model, items are printed and shipped directly to buyers following a successful transaction. This eliminates the need for supervision, upfront investment, storage space, or security for the goods.
You can print and send small or large volumes of customized products with direct client shipping without worrying about the stock. Your Print Provider will receive orders placed in your store using this fulfillment strategy.
Making more money with less work is as simple as creating and selling print on demand products. You don’t have to worry about keeping inventory or making upfront financial commitments, so you can focus on creating unique designs and marketing your brand instead.
Why Choose to Sell on WooCommerce?
WooCommerce is a free WordPress eCommerce platform for building online stores. With just a couple of clicks, WooCommerce allows you to create and personalize a beautiful online store on your WordPress website. But what makes it the best choice for your online POD store?
Necessary POD Store Features
Some key POD store requirements are the following:
Easy store setup
Seamless integration
Simple shipping option management
Full control over storefront design and functionality
Ability to accept secure payments
WooCommerce meets all of these requirements and more. It is fully open source and comes with a worldwide community of contributors, which means it is extremely adaptable to your customers’ ever-changing needs.
Easy Customizations
As mentioned, having full control over your store’s customization is essential. This is why you’ll be delighted to learn that on WooCommerce, there are tons of great eCommerce themes with various styling options.
There are both free and paid theme options to choose from, but our favorite is the flexible Total theme. With Total’s drag-and-drop page builder, you can design your storefront from scratch or make do with one of the ready-made designs and tweak them up a bit to better suit your preferences.
Wide Array of Addons
WooCommerce is popular, and at the time of writing there are over 55,000 plugins available from WooCommerce and third party developers. These can help you with storefront theme customization, product management, email marketing, security, subscriptions, shipping, product images, SEO, and more.
Whatever feature you want to add to WooCommerce, there is certain to be an extension or add-on plugin that meets your needs. In fact, there are multiple great plugin options to easily create a POD store, regardless of your niche.
Self-publishing for new authors (Acutrack)
Selling prints for photographers (Fotomoto)
Creating any type of POD store (Printify)
A platform such as Printify is a more extensive and universal option that any creative individual or business can use for selling their merchandise. This is why we will use it as an example of how to set up your WooCommerce store with POD.
How to Create a POD Store With WordPress and Printify?
WordPress and Printify have a free and extensible nature that makes them ideal for setting up shop online. The WordPress admin interface is easy to use, even if you don’t have coding experience. The same with Printify – it is a highly intuitive platform.
A print-on-demand WooCommerce store will stay current and run well since it can be modified to reflect industry standards and best UI and UX practices. With a flexible platform, your business can quickly adapt and add new features as it grows.
To improve the shopping experience for your customers, you should design a flexible and user-friendly store with unique products. Below are the steps that will help you start an online POD store on WooCommerce.
1. Register to a POD Platform
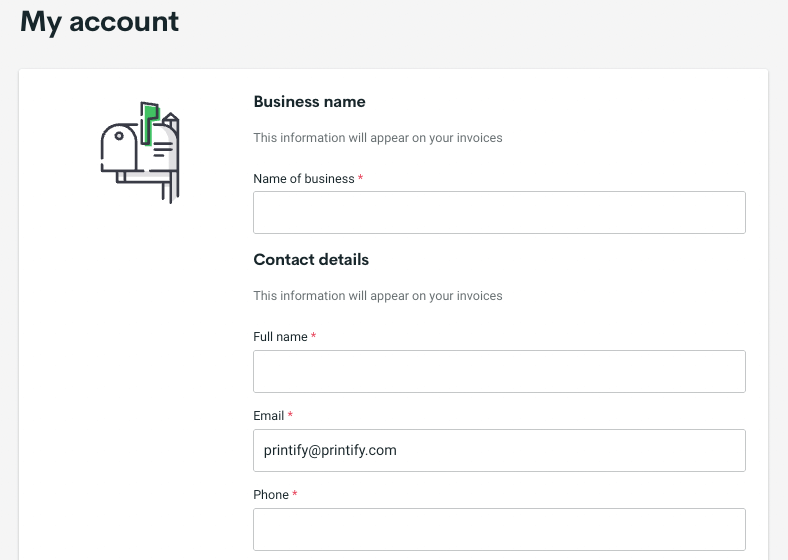
To get started, go to a POD platform, such as Printify, and sign up for a free account. On the registration page, you’ll be prompted to provide a name and details of your business, but you can always fill them in later on.
After registering, take some time to play around and explore the site to get a better understanding of how it works and what it offers. Make sure to go over all the settings and preferences so that all is configured exactly as you’d like.
2. Integrate your WooCommerce store With Printify
There are multiple steps you will have to take to configure your WooCommerce store before integrating it with Printify, such as:
Enable the legacy REST API in the WooCommerce settings
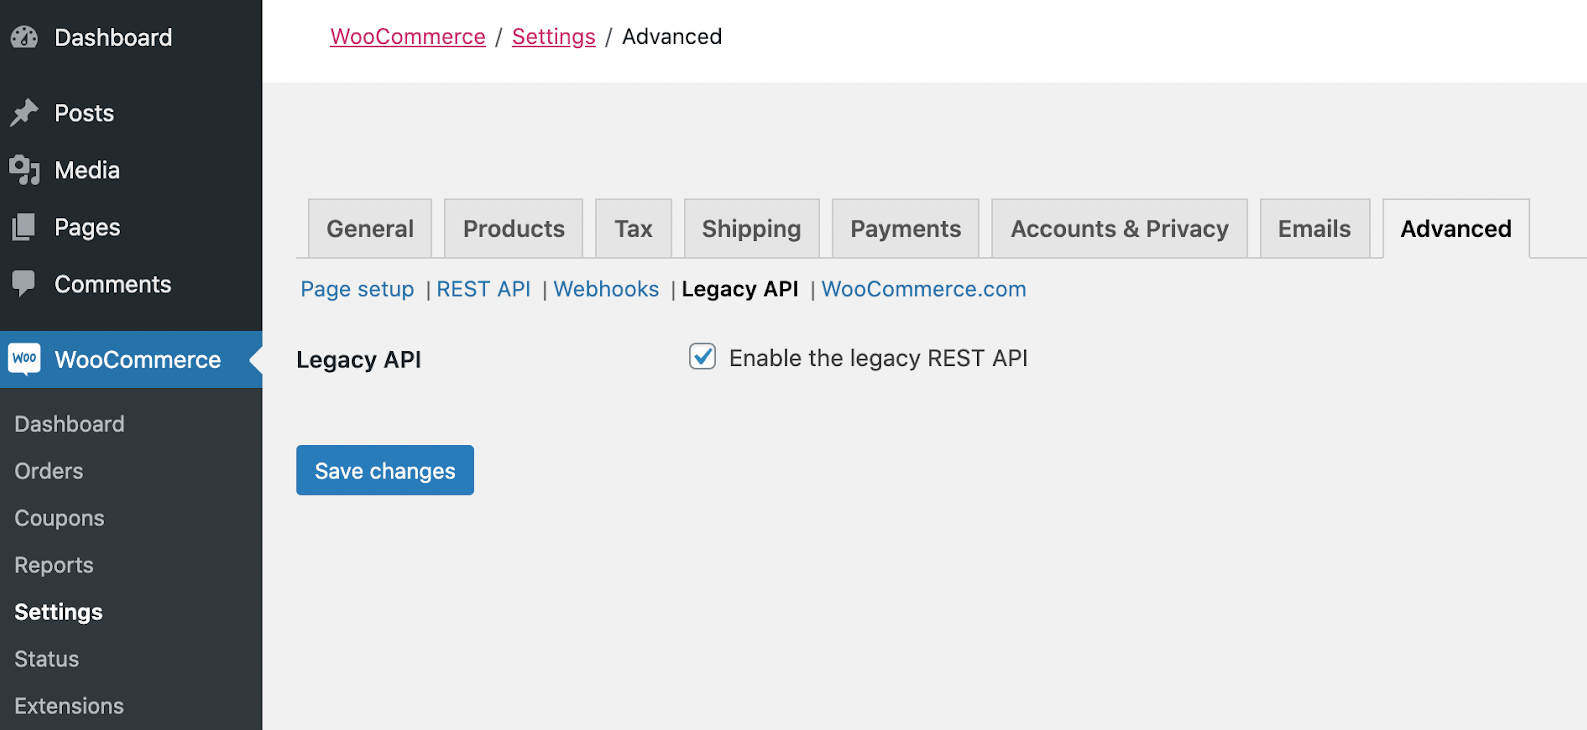
First, go to your WordPress admin dashboard, open WooCommerce, and choose the Settings tab. The next step is to click the Advanced option in the menu bar. Next, select Legacy API and click the box Enable the legacy REST API. Lastly, click on Save changes.
Adjust the permalink settings on WooCommerce
Reload WordPress and go to Settings → Permalinks in the left-side menu. Pick any other option besides Plain (for example, Day and name). Click Save Changes.
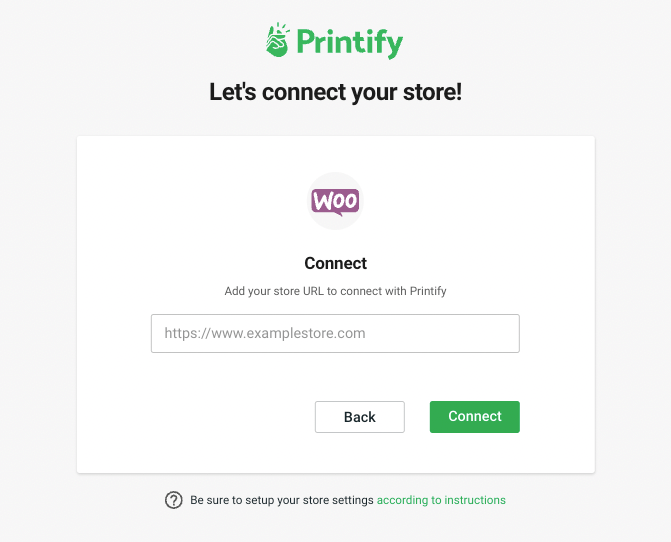
Connect the WooCommerce store to Printify
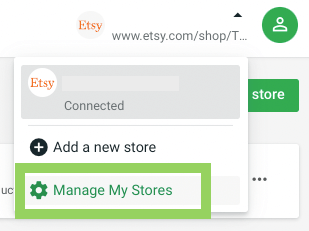
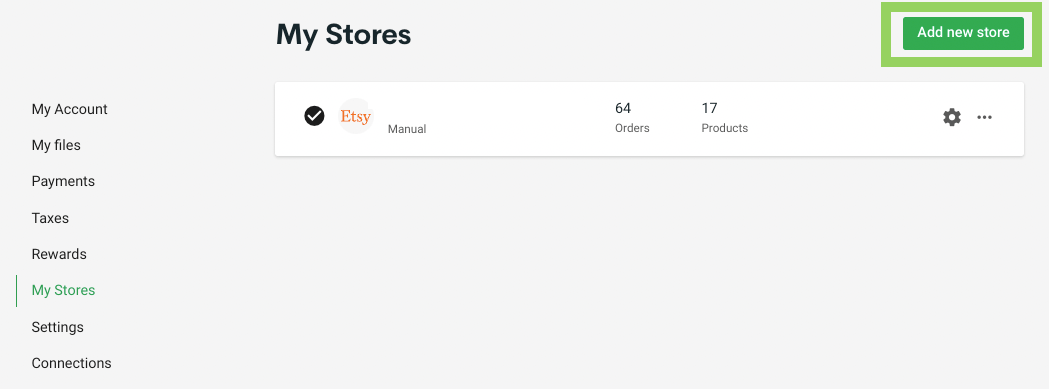
Finally, you may go to printify.com and log into your account. Next, click on Manage My Stores and select Add new store → Connect.
Simply input your WooCommerce store URL when prompted, and ensure that it is exactly the same as seen in your WordPress admin → Settings. And that’s it – the integration is complete!
3. Download the Printify Shipping Rate Plugin for WordPress

Your shop’s data is now synchronized with Printify. However, the free Printify plugin is required to obtain precise delivery costs and estimates for your print-on-demand items.
To install and activate the plugin, navigate to Plugins → Add New and look up “Printify” in the search bar. Once you find it, click Install Now. When the installation is done, click Activate – that is all.
Of course, you can also set up shipping manually, but it is best to use the print provider’s rates when just starting out so that they are correct and accurate.
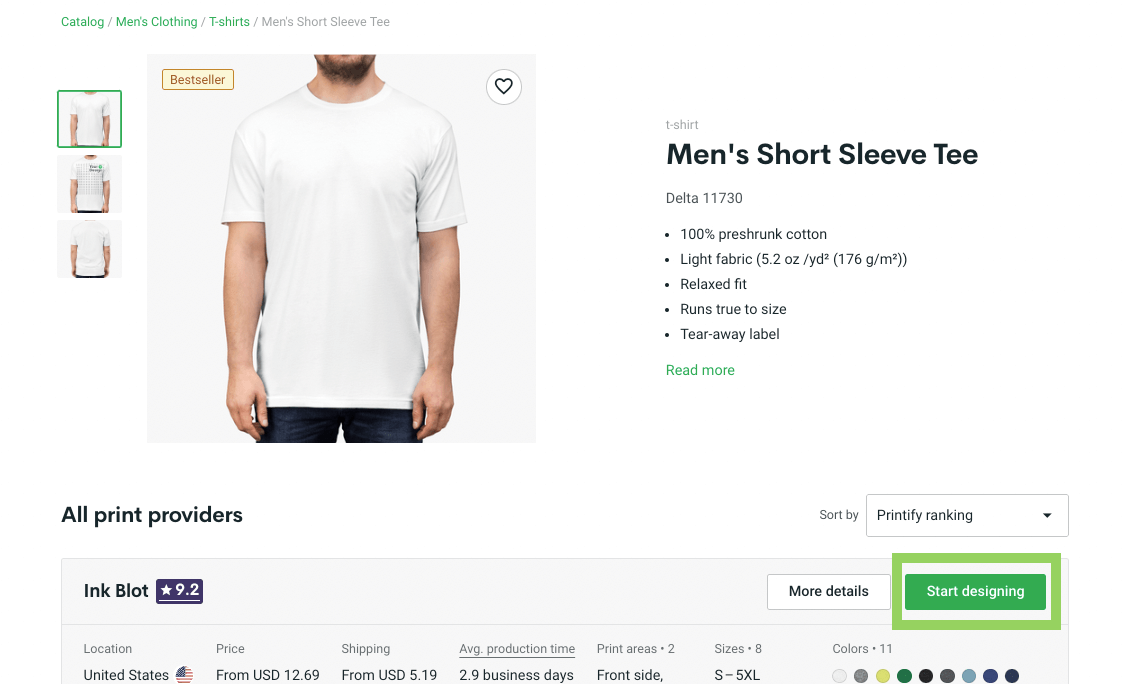
4. Create Products on Printify
Your Printify and WooCommerce accounts are now perfectly synchronized. Next, all that’s left to do is to make some custom products. Get back to your Printify account for that.
To begin, you must settle on the kind of product you’ll develop. To achieve this, use the interface’s catalog filter choices on the left. Then, when you locate an item you’re interested in, you must click Start Designing to begin. Printify will provide you with basic details like cost, printing location, turnaround, size options, etc.
When ready to add your design, Printify will lead you to the editing screen of their mockup generator. Images for your design can be uploaded and organized in separate Layers. You can apply your own design files or use Pirntify’s free graphics library to create your designs.
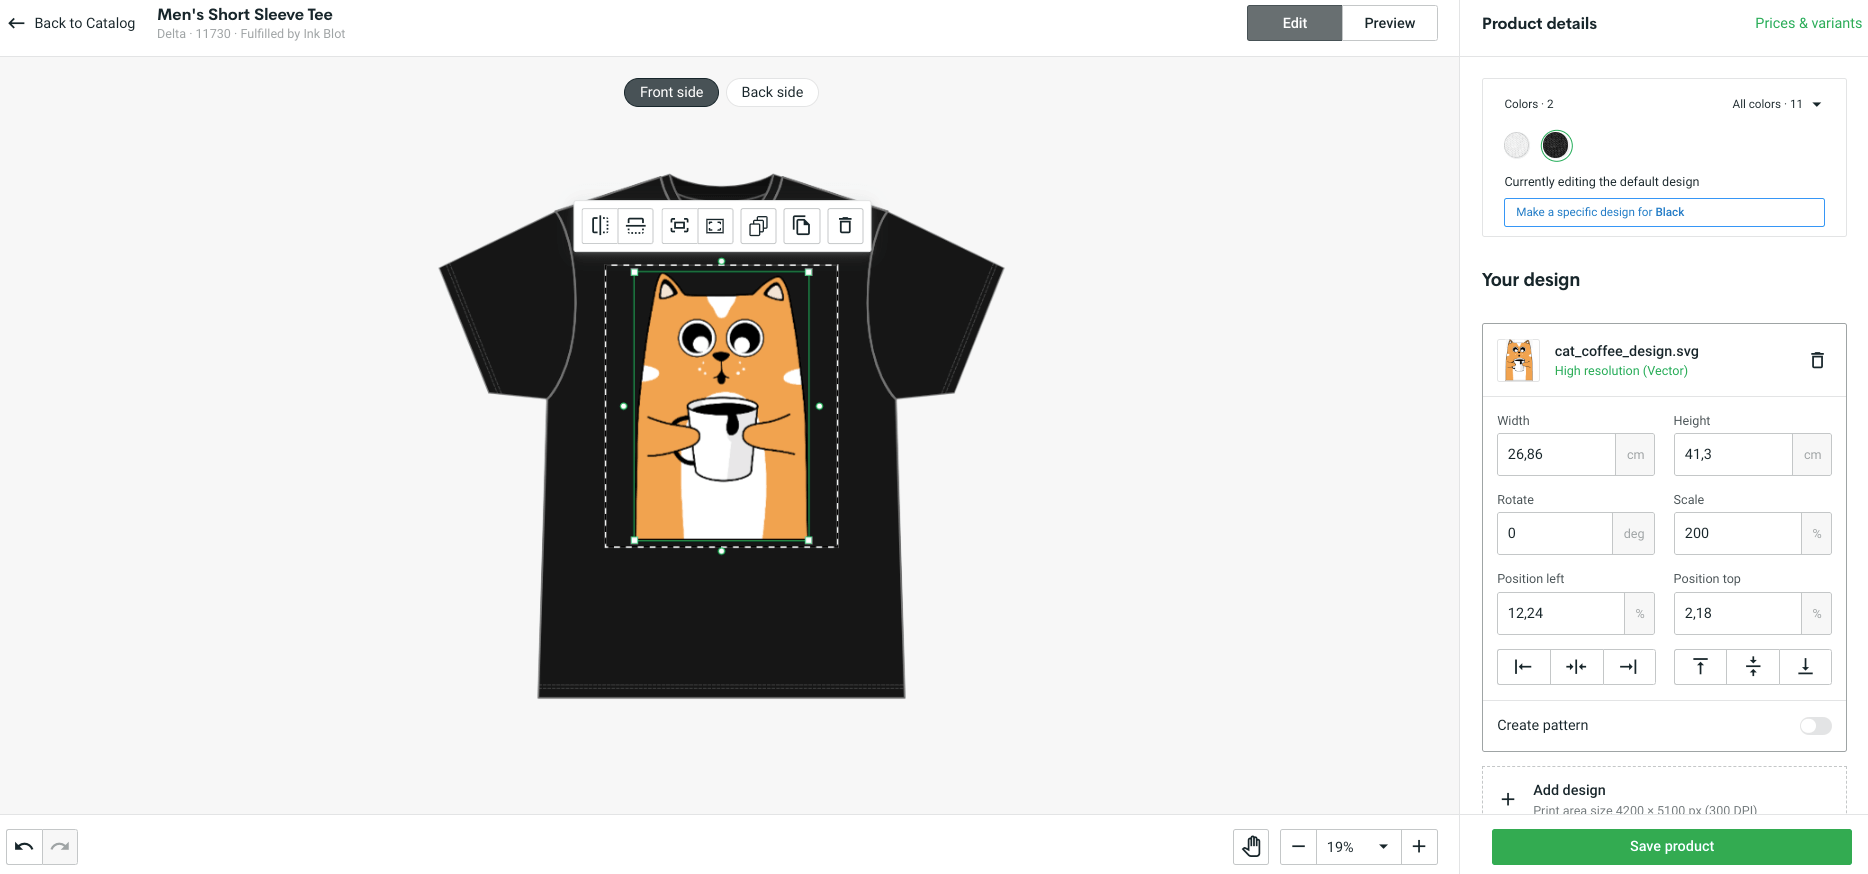
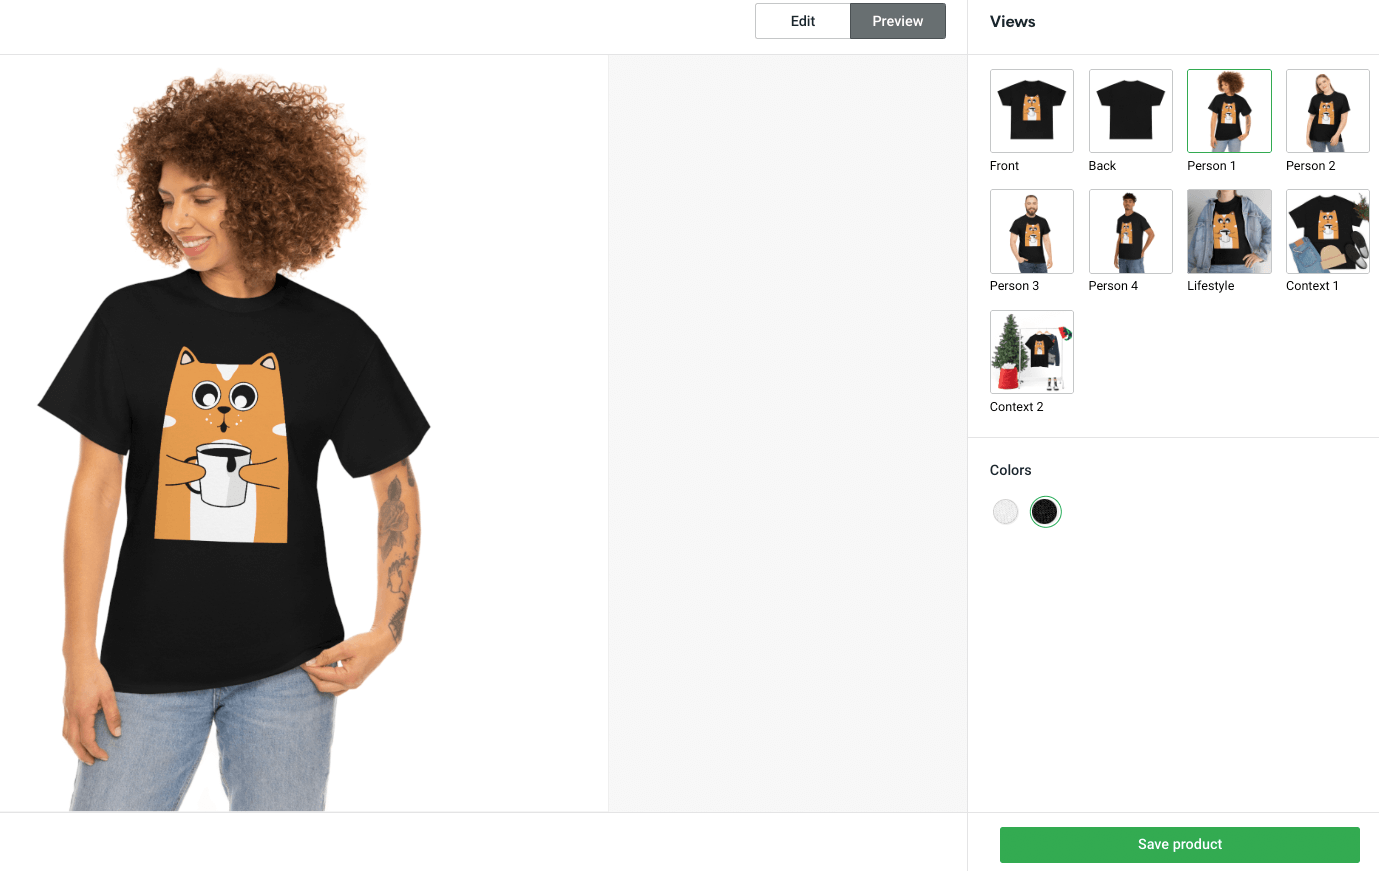
You may easily switch to Preview Mode to see how your design will look on the final product. When you’ve finished working on your layout and are satisfied with the results, select Save product.
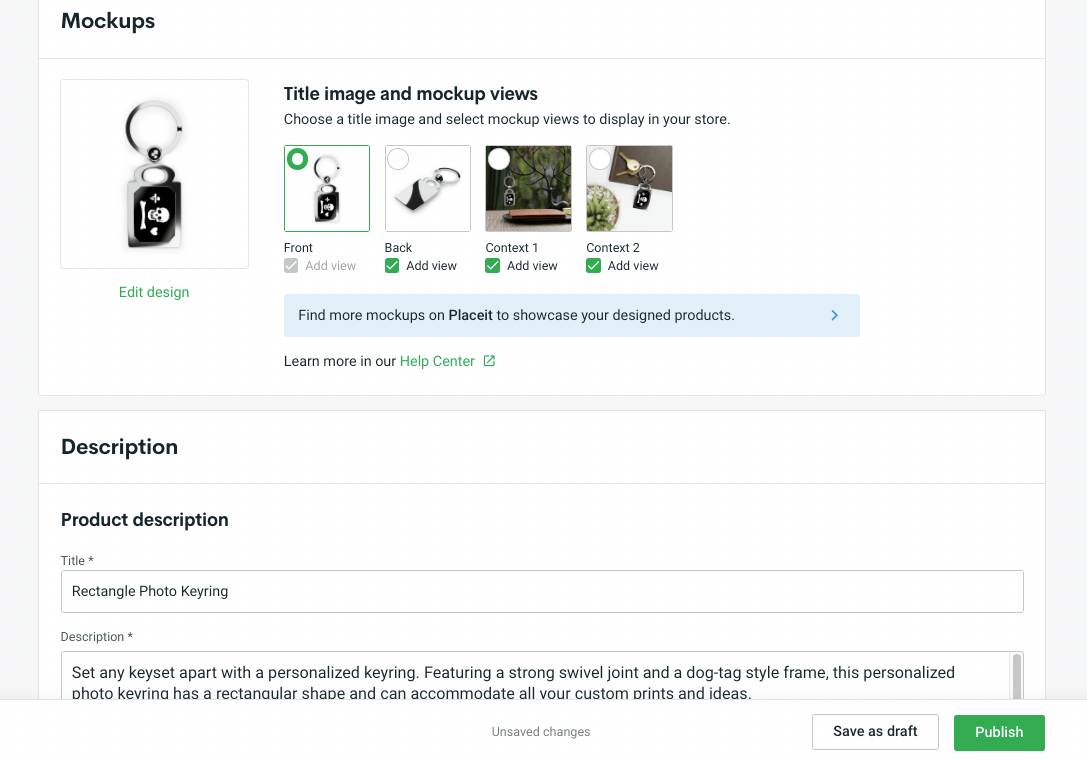
5. Publish Products to WooCommerce
Publish your created product to WooCommerce once your design is complete. Before or after publishing, you can begin customizing the finer points of your product in WooCommerce, such as:
Mockup images: Select which mockup images to use as product photos for your WooCommerce store.
Description: Printify automatically populates the description field with the essential product’s specifications; you may edit this if necessary.
Pricing: Retail Price Setting entails deciding what you want to charge for each product variant. Printify allows you to set the retail price, profit, and profit margin on their side as well.
Store details: you can add product categories and collections (for example, group your white-label products by type, style, or functionality).
Printify’s transparent pricing is one of its best features. Quickly view your earnings per unit at the retail pricing you’ve set. After finalizing the product’s mockups, description, and pricing, you can publish or republish your product to update it.
When you confirm your changes by clicking the Publish button, your product and its accompanying text and images will go live. You needn’t take any special measures within WooCommerce unless you want to do some further customization of your site.
Other than that, your products will be live and available for purchase by your customers.
6. Customize Your WooCommerce Storefront and Start Selling
You can customize your WooCommerce storefront yourself if you know how to (some coding knowledge will go a long way here), or simply use themes and plugins that will help with that.
For instance, the Storefront WooCommerce Customizer add-on expands the customization capabilities for your website’s WooCommerce pages. It’s time to get your online store up and running using WooCommerce.
Why Choose Printify For Your Online Store?
Anybody can open a shop and start selling their wares on the internet with the help of Printify, a fully hosted eCommerce firm. The process could not be more straightforward.
Printify enrollment procedure is simple, and once you’re in, you’ll have access to a safe website with integrated credit card processing.
Fast and simple integrations. It has never been simpler to sell a product online without keeping stock. You may create a fully functional online store with Printify’s help. Getting started on the platform is as simple as signing up and integrating your sales channel.
No upfront investment. With POD, you pay for the production of an order only when your customer has already placed it and paid for it.
Wide print provider network. Printify has a wide network of print providers all over the world, meaning that you can design and ship your products from all their locations and flourish as an international business.
To summarize, this post has been your comprehensive resource for learning about and implementing WooCommerce into a print-on-demand business. If you follow our guide, setting up a print-on-demand shop on the WooCommerce platform will be a breeze.
We wish you the best of success in acquiring a comprehensive understanding of the WooCommerce print-on-demand business model and implementing the helpful tips and instructions that we have provided.