Recently one of our readers asked if there is an easy way to add box shadows in WordPress?
Shadows can make your most important content stand out and grab your visitors’ attention. They can also help flat website designs appear more engaging and interesting.
In this article, we will show you how to easily add box shadows in WordPress, step by step.
Why Add Box Shadows in WordPress?
A box shadow, sometimes also known as a drop shadow, is a visual effect that makes it look like an onscreen object is casting a shadow.
We tend to pay more attention to objects that appear closer to us. That’s why many website owners add box shadows to their most important content to make it look like it’s hovering above the page.
For example, if you add a big shadow to a call to action button, then it will look physically closer to the visitor. This will draw the person’s attention toward this important button.
With that said, let’s see how you can add box shadows to your WordPress blog or website. Simply use the quick links below to jump straight to the method you want to use.
Method 1. How to Add Box Shadows Using Code (Recommended)
When adding box shadow, the best practice is to only add it on your most important website elements. If you add a unique shadow effect to each WordPress block, then it can make your site look messy and confusing.
It’s also important that you keep your box shadows consistent across the site. The best way to do this is by defining the style in CSS using WPCode.
WPCode is the best code snippets plugin used by over 1 million WordPress websites. It makes it easy to add custom code in WordPress without having to edit the functions.php file.
With WPCode, even beginners can edit their website’s code without risking mistakes and typos that can cause many common WordPress errors.
The first thing you need to do is install and activate the free WPCode plugin. For more details, see our step-by-step guide on how to install a WordPress plugin.
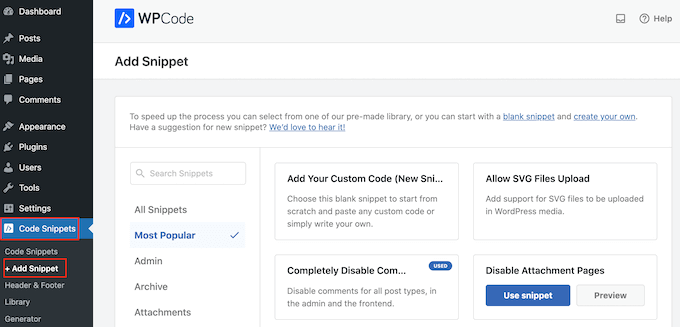
Upon activation, head over to Code Snippets » Add Snippet.
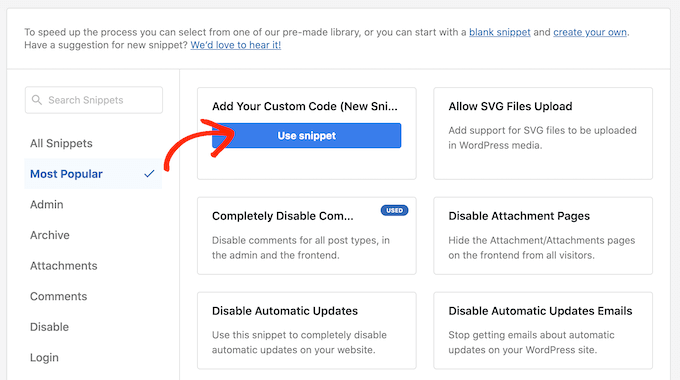
Here, simply hover your mouse over ‘Add Your Custom Code.’
When it appears, click on ‘Use snippet.’
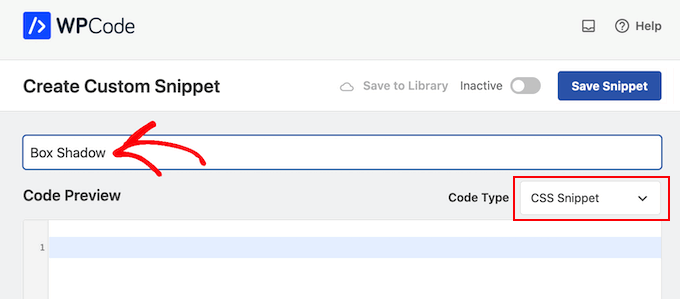
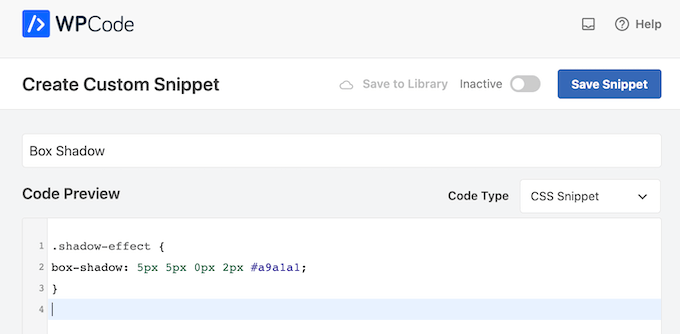
To start, type in a title for the custom code snippet. This can be anything that helps you identify the snippet in the WordPress dashboard.
After that, open the ‘Code Type’ dropdown and select ‘CSS Snippet.’
In the code editor, add the following code snippet:
box-shadow: 5px 5px 0px 2px #a9a1a1;
}
In the above snippet, you may need to replace the px values depending on the kind of shadow you want to create.
To help you out, here’s what the different px values mean, going from left-to-right:
Horizontal offset. When you set a positive value, the shadow gets pushed to the left. If you type in a negative value like -5px, then the shadow will be pushed to the right. If you don’t want to add a horizontal offset, then you can use 0px instead.Vertical offset. If you use a positive value, then the shadow will be pushed downwards. If you type in a negative value then the shadow will be pushed upwards. If you don’t want to offset the shadow vertically, then just type in 0px.Blur radius. This blurs the shadow so that it doesn’t have any harsh edges. The higher the value, the greater the blur effect. If you prefer to use sharp edges, then type in 0px.Spread radius. The higher the value, the greater the shadow’s spread. This value is optional, so skip this one if you don’t want to show a spread.Color. Although grey is the most common color for shadows, you can use any color you want by typing in a hex code. If you’re not sure what code to use, then you can explore different colors using a resource like HTML Color Codes.
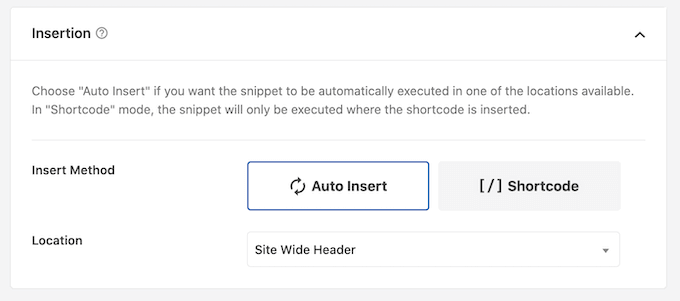
When you’re happy with the snippet, scroll to the ‘Insertion’ section. WPCode can add your code to different locations, such as after every post, frontend only, or admin only.
We want to use the custom CSS code across our entire WordPress website, so click on ‘Auto Insert’ if it isn’t already selected. Then, open the ‘Location’ dropdown menu and choose ‘Site Wide Header.’
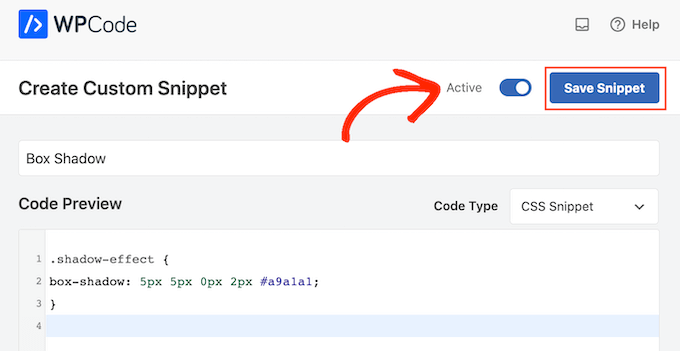
After that, you’re ready to scroll to the top of the screen and click on the ‘Inactive’ toggle, so it changes to ‘Active.’
Finally, click on ‘Save Snippet’ to make the CSS snippet live.
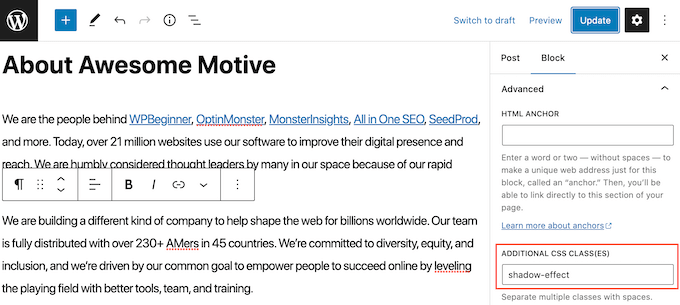
Now, you can add the custom CSS class to any block.
In the WordPress content editor, simply select the block where you want to add a box shadow. Then, in the right-hand menu click to expand the ‘Advanced’ section.
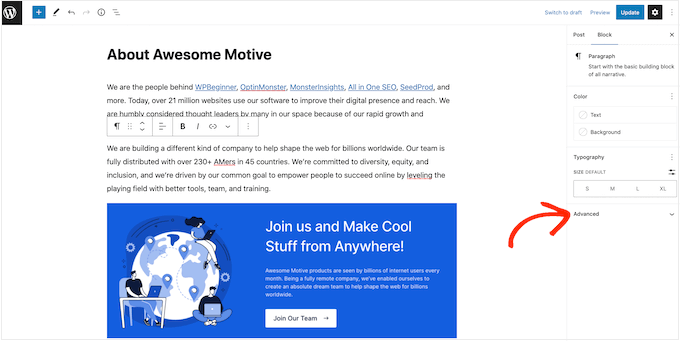
Here, you’ll see fields where you can add different classes.
In ‘Additional CSS Class(es),’ type in shadow-effect.
When you’re ready to publish the box shadow, just click on the ‘Publish’ or ‘Update’ button.
Now if you visit your website, you’ll see the box shadow live.
Method 2. Add a Box Shadow Using a Free Plugin (Quick and Easy)
If you’re not comfortable writing code, then you might prefer to create shadows using Drop Shadow Box. This free plugin allows you to add box shadows to any block using the built-in WordPress page and post editor.
First, you’ll need to install and activate the plugin. If you need help, then please see our guide on how to install a WordPress plugin.
There are no settings to configure, so you can start using this plugin straight away.
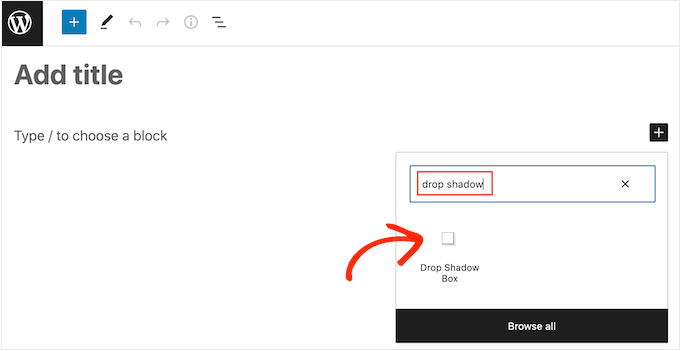
To add a drop shadow, simply click on the ‘+’ icon and start typing in ‘Drop Shadow Box.’ When the right block appears, give it a click to add it to the page or post.
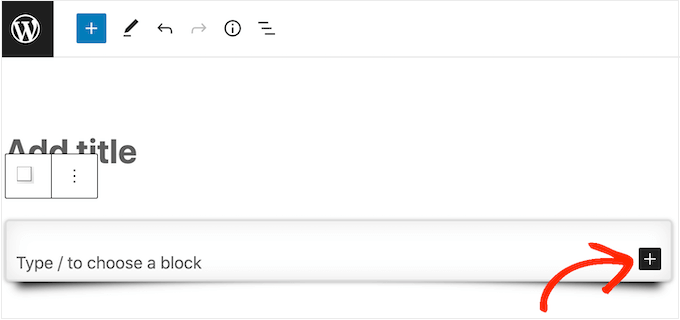
This adds the drop shadow as an empty box, so the next step is adding some content.
To do this, go ahead and click on the ‘+’ inside the Drop Shadow Box block.
Then, simply add the block you want to use and configure it as normal.
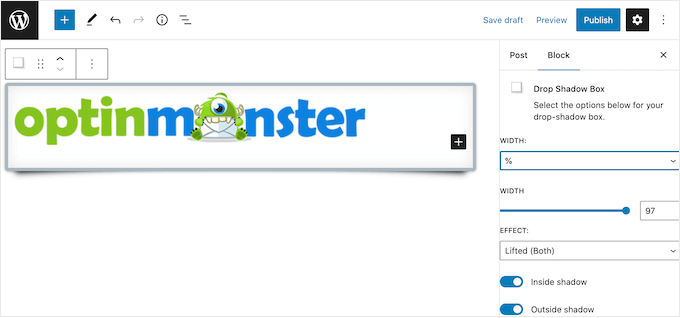
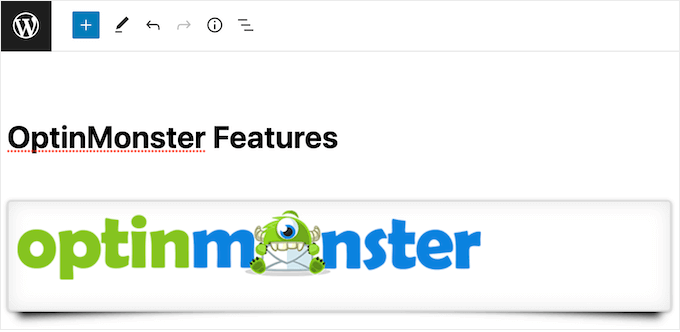
For example, in the following image we’ve added an Image block and selected a picture from the WordPress media library.
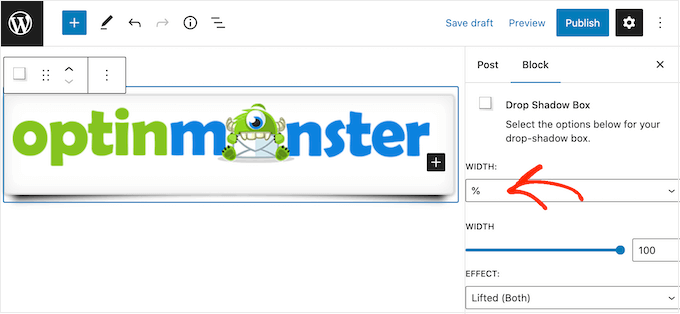
With that done, click to select the Drop Shadow Box block. In the right-hand menu, you’ll see all the settings you can use to style this block.
WordPress sets the shadow’s width automatically but you can change this by opening the ‘Width’ dropdown and then choosing either ‘Pixels’ or ‘%.’
You can then resize it using the settings that appear.
The Drop Box Shadow plugin comes with a few different effects such as curved edges and an eye-catching ‘Perspective’ effect.
To preview the different effects, simply open the ‘Effect’ dropdown and choose from the list. The preview will update automatically so you can try different styles to see what you prefer.
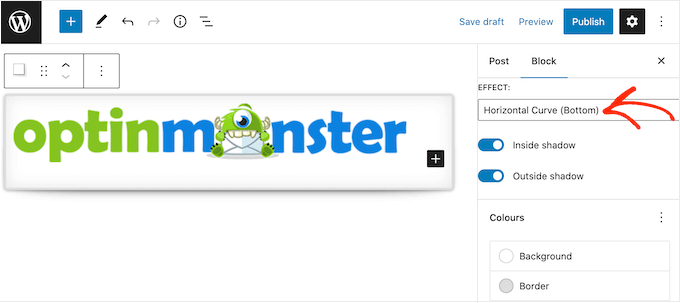
You can also change whether the plugin shows the shadow inside the box, outside the box, or both using the ‘Inside Shadow’ and ‘Outside Shadow’ toggles.
After that, you can change the color of the box and border using the settings under the ‘Colors’ header.
Just be aware that ‘Background’ refers to the inside of the Drop Shadow Box, while ‘Border’ appears outside of the block.

If you want to create a softer, curved shadow box then you can enable the ‘Rounded corners’ toggle. Finally, you can change the alignment and padding, similar to how you customize other blocks in WordPress.
To create more box shadows, just follow the same process described above.
When you’re happy with how the page looks, simply click on ‘Update’ or ‘Publish’ to make all your new box shadows live.
Method 3. Add a Box Shadow Using a Page Builder (Advanced)
If you want to add box shadows to landing pages, custom homepages, or any part of your WordPress theme, then we recommend using a page builder plugin.
SeedProd is the best drag and drop WordPress page builder. It allows you to design custom landing pages and even create a custom WordPress theme without having to write a single line of code.
It also lets you add box shadows to any block using its advanced drag-and-drop editor.
First, you need to install and activate the SeedProd plugin. For more details, see our step-by-step guide on how to install a WordPress plugin.
Note: There’s also a premium version of SeedProd that comes with more professionally-designed templates, advanced features, and WooCommerce integration. However, we’ll be using the free version as it has everything you need to add box shadows in WordPress.
After activating the plugin, SeedProd will ask for your license key.
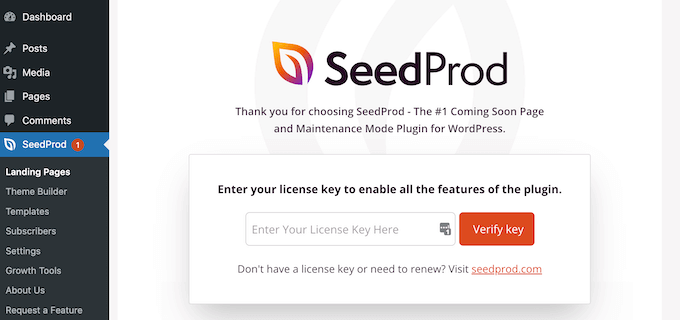
You can find this license key under your account on the SeedProd website. After entering the information, click on the ‘Verify Key’ button.
After entering your key, go to SeedProd » Landing Pages in your WordPress dashboard.
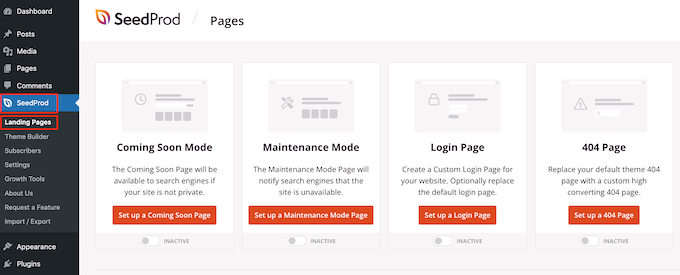
SeedProd comes with 150 professionally designed templates that are grouped into categories. Along the top you’ll see categories that let you create beautiful coming soon pages, activate maintenance mode, create a custom login page for WordPress, and more.
All of SeedProd’s templates are easy to customize, so you can use any design you want.
When you find a template that you like, simply hover your mouse over it and click on the checkmark icon.

You can now type in a name for your landing page into the ‘Page Name’ field. SeedProd will automatically create a ‘Page URL’ using the page name.
It’s smart to include relevant keywords in your URL wherever possible, as this can help search engines understand what the page is about. This will often improve your WordPress SEO.
To change the page’s automatically-generated URL, simply type into the ‘Page URL’ field.
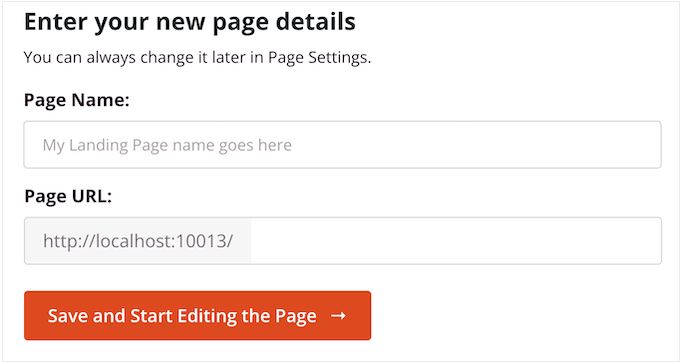
When you’re happy with the information you’ve typed in, click on ‘Save and Start Editing the Page.’ This will load the SeedProd page builder interface.
This simple drag-and-drop builder shows a live preview of your page design to the right. On the left is a menu showing all the different blocks and sections you can add to the page.

When you find a block that you want to add, simply drag and drop it onto your template.
To customize a block, go ahead and click to select that block in the SeedProd editor. The left-hand menu will now update to show all the settings you can use to customize the block.
For example, if you click on a Headline block then you can type in your own text, or change the text color and font size.

As you’re building the page, you can move blocks around your layout by dragging and dropping them. For more detailed instructions, please see our guide on how to create a landing page with WordPress.
To create a box shadow, click to select any block in the SeedProd page editor. The settings in the left-hand menu may vary between blocks, but you’ll typically need to click on an ‘Advanced’ tab.
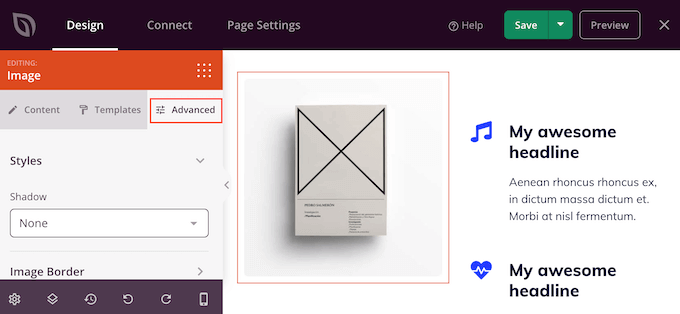
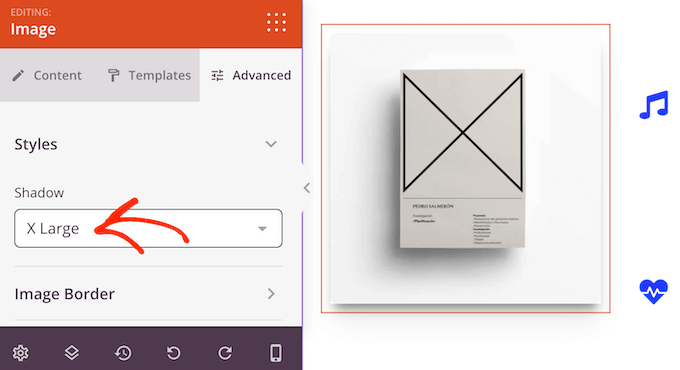
Here, look for a ‘Shadow’ dropdown menu under the ‘Styles’ section. Simply open this dropdown and choose a shadow style such as Hairline, Medium, or 2X Large.
The preview will update automatically, so you can try different styles to see what looks the best on your page design.
If you don’t want to use any of the ready-made styles, then click on ‘Custom.’
This adds some new settings where you can change the color, blur, spread, and position of the custom shadow.
That done, you can continue working on the page by adding more blocks and box shadows.
When you’re happy with how the page looks, click the ‘Save’ button and then choose ‘Publish’ to make it live.
Method 4. How to Add a Box Shadow Using CSS Hero (Premium Plugin)
If you’re not comfortable working with code but still want to create advanced box shadows, then you can try CSS Hero. This premium plugin allows you to fine-tune every part of your WordPress theme without having to write a single line of code.
CSS Hero allows you to create a unique shadow for each block, so it’s also a great choice if you want to create lots of different shadow effects.
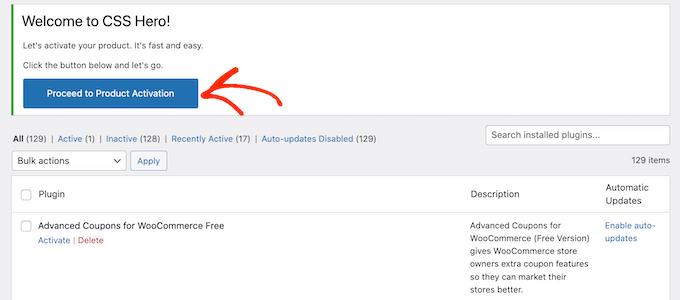
First, you need to install and activate the CSS Hero plugin. For more details, see our step-by-step guide on how to install a WordPress plugin.
Upon activation, you’ll see a ‘Proceed to Product Activation’ button at the top of the screen. Go ahead and click on this button.
This will take you to the CSS Hero website where you can log into your account and get a license key. Simply follow the onscreen instructions, and you’ll be redirected back to your site in a few clicks.
Next, click the ‘Customize with CSS Hero’ text in the WordPress admin toolbar.
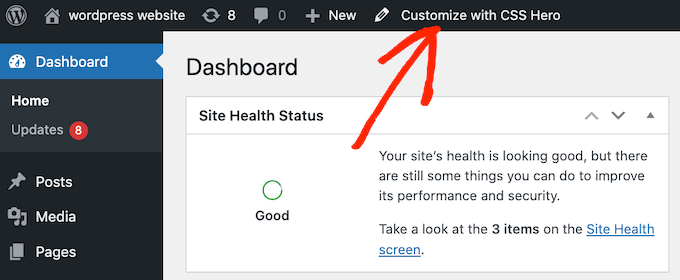
This will open the CSS Hero editor.
By default, clicking on any piece of content will open a panel with all the settings you can use to customize that content.
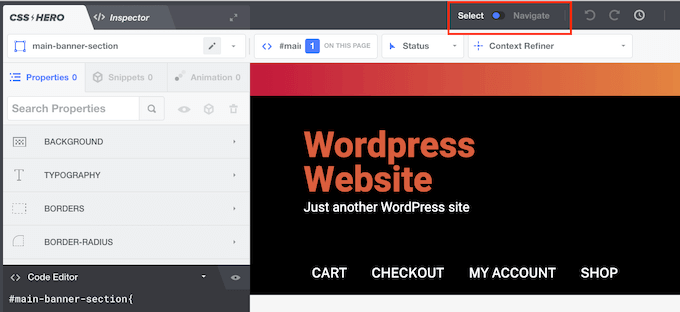
This is great if you want to add a box shadow to your website’s homepage. However, if you want to customize any other page then you’ll need to switch from ‘Select’ mode to ‘Navigate’ mode, as this allows you to interact with menus, links, and other content as normal.
To do this, click on the ‘Select / Navigate’ toggle in the toolbar so that it shows ‘Navigate.’
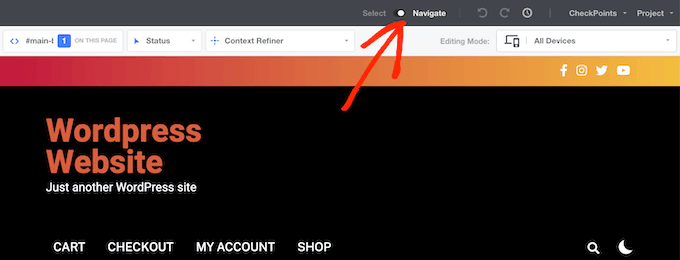
You can now navigate to the page or post where you want to add the shadow.
As soon as you reach that page, go ahead and click on the ‘Select / Navigate’ toggle again so that it shows ‘Select.’
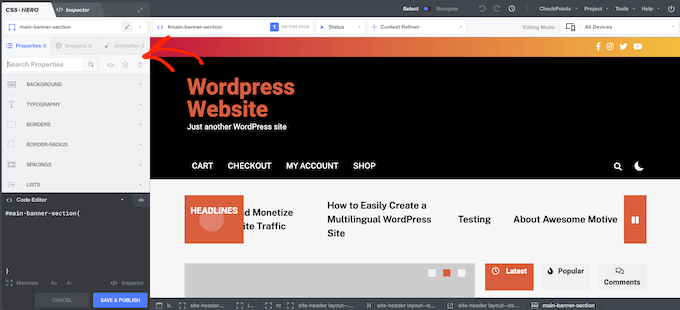
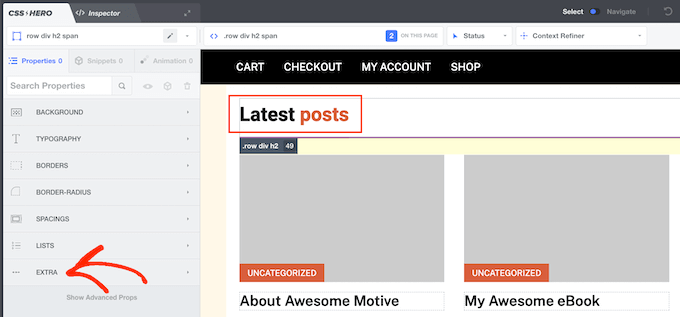
With that done, click on the paragraph, image, button, or any other content where you want to add a box shadow.
In the left-hand panel, click on ‘Extra.’
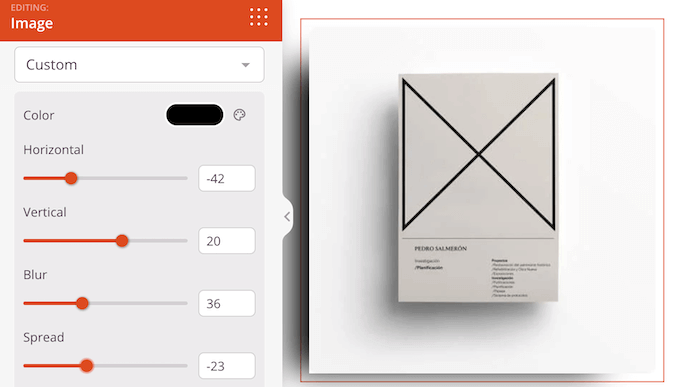
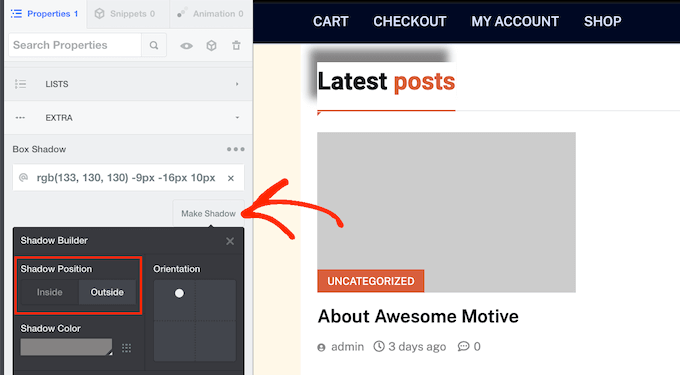
You can now go ahead and click on ‘Make Shadow,’ which shows all the settings you can use to create a box shadow.
To start, you can change whether the shadow appears inside or outside the block using the ‘Shadow Position’ settings.
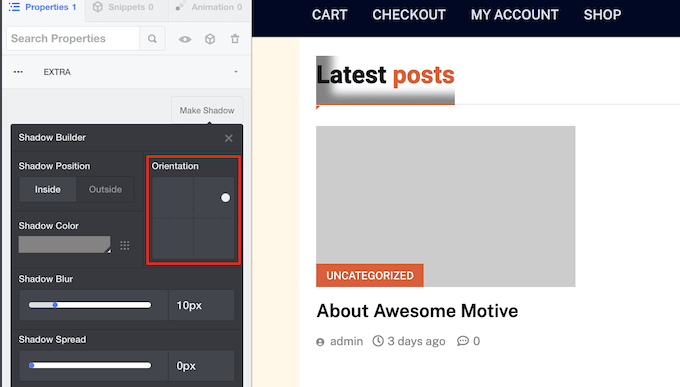
After making this decision, you can fine-tune the shadow’s orientation using the small dot in the ‘Orientation’ box.
Simply drag and drop the dot into a new position to see it move in the live preview.
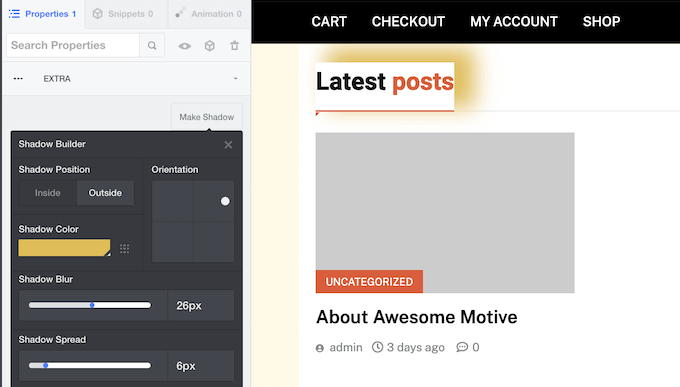
When you’re happy with the shadow’s position, you can change its color, blur, and spread.
CSS Hero will show these changes immediately, so you can try different settings to see what looks the best.
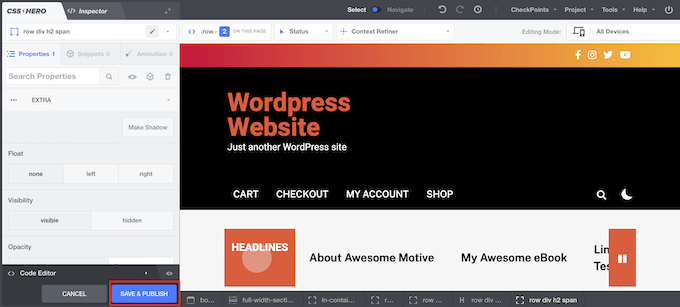
To add a box shadow to other blocks, just follow the same process described above.
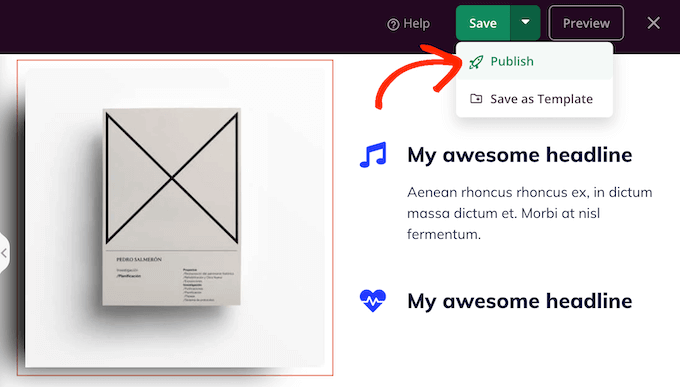
When you’re happy with how the page looks, click on ‘Save & Publish’ to make it live.
We hope this tutorial helped you learn how to add a box shadow in WordPress. You may also want to learn how to create a table of content in WordPress, or check out our list of the best WordPress popup plugins.
If you liked this article, then please subscribe to our YouTube Channel for WordPress video tutorials. You can also find us on Twitter and Facebook.
The post How to Easily Add Box Shadow in WordPress (4 Ways) first appeared on WPBeginner.